This is the fourth installment in a series regarding the construction and outfitting of a wilderness camp from the book “Woodcraft” by E.H. Kreps, 1919. In this installment we go over finishing the floor, door, windows and sealing cracks. If you missed the first three installments, follow the links below. In future posts, we’ll cover the furnishing of the home camp.
1st Installment: Selecting a location and initial preparation of a wilderness camp
2nd Installment: Construction of walls, floor, door and windows for a wilderness cabin
3rd Installment: Construction of gables and roof for a wilderness cabin

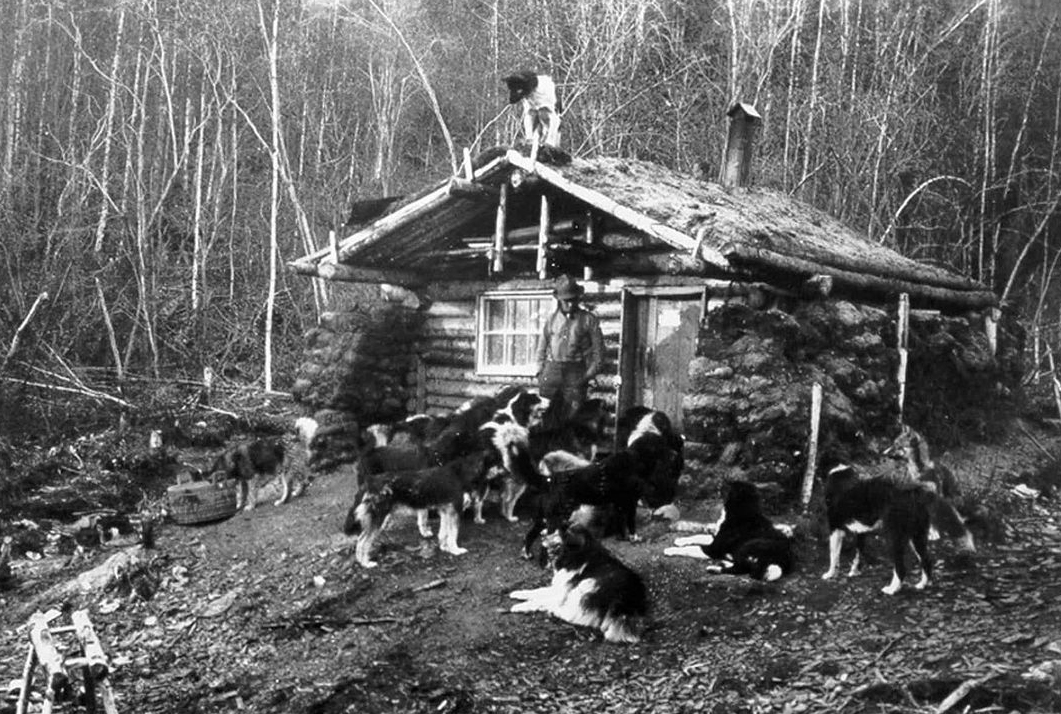
With the roof completed our cabin becomes a real shelter and we can camp inside at night. If necessary the flooring may be postponed for a few days, but we may as well finish it at once, so we clean out the chips and commence laying the floor. This we make of straight spruce poles about four or five inches thick. In the end of the camp where our beds are to be we leave them in their natural round state, merely flattening them on the underside where they rest on the sills, to make them fit and lie firmly in their places. But when the floor has grown at this end to a width of about four feet we adopt a different plan. We now hew the poles straight and smooth on one side their entire length, and flatten the underside where they rest on the sills, also straighten the sides so they fit up snugly against one another. At the place where the stove is to be placed we leave an opening of two and a half by four feet, and around this place we fasten smooth pieces of wood about four inches thick, so that it makes of the opening a sort of box. When our floor is completed we nail down along each wall, a pole, which covers the ends of the floor poles and holds them all firmly in place.
To complete our cabin now we need only a door, a window, and something to close the cracks. For a door we split cedar or balsam wood into planks, which we place on edge in notches cut in a log, and hew down smoothly on both sides with the axe. Then we straighten the edges and measuring our door frame carefully we fit the boards into the opening, binding them all together by nailing across near each end a narrow board. We also place a strip diagonally across the door from near one corner to the opposite, to stiffen the door and prevent warping. Hinges we make of wood, fasten them together with a single large nail through each, and fasten the door to the wall. Then on the outside we hew the ends of the logs until they are flush with the edges of the door frame, and nail a flattened strip along both sides of the doorway. This is not absolutely necessary, but it gives the doorway a more finished appearance, and increases the rigidity of the wall.
Our window sash also makes considerable work. For this we split soft, dead cedar and hew it into three-inch strips. From these we make a frame that will fit inside the window boxing, and make the strips of this frame flush at the corners by cutting away half of each. Then at the proper places we fit our lighter cross strips, sinking them into the wood at the ends, and fastening with small nails. Grooves are then cut in the strips and the frame itself to receive the sheets of glass, which are put in place and fastened with tacks. The window is then placed in the wall and secured by nailing narrow strips of wood against it. As a window at its best is apt to admit a lot of cold air it will pay well to spend some time at this work and make the window fit snugly.
All that now remains to be done is to close the cracks between the logs. Since our logs were of a uniform size and have been well notched down there are no large cracks, and no blocking is needed. The warmest chinking, outside of rags, which we do not have, is woods moss. That found growing on rocks and logs is best, for it does not dry out and shrink as much as marsh moss, and there is an abundance of this near at hand. We gather a few bags of this moss and with a piece of wood we drive it into the cracks all around the walls. We also keep a small quantity of this moss in the cabin, for no matter how firmly it is driven into the cracks it will shrink and become loose after awhile, and this must be tightened and more moss driven in.
Our little cabin is now complete. It has taken much hard work to build it, but it is worth the effort for it is a comfortable, home-like camp. The cold winter winds may howl through the forest and the snow may fall to a depth of several feet, but here we can live as comfortably as woodsmen can expect to live in the wilds.
In the next post, we’ll start furnishing the home camp with instructions from “Woodcraft” by E.H. Kreps, 1919.